Mobile Computing on MacOs
Prerequisites
Install homebrew
Install JDK 25
- Open terminal
- Install Java:
brew install --cask temurin@25
- Verify the installation, make sure that the version is “25” and the name contains “OpenJDK Runtime Environment Temurin”:
java -version
- The output should look like this:
openjdk version "25" 2025-09-16 LTS
OpenJDK Runtime Environment Temurin-25+36 (build 25+36-LTS)
OpenJDK 64-Bit Server VM Temurin-25+36 (build 25+36-LTS, mixed mode, sharing)
Install Gradle
- Install Gradle:
brew install gradle@9
- Verify the installation, make sure that the version is “9”:
gradle -version
- The output should look like this:
------------------------------------------------------------
Gradle 9.3.1
------------------------------------------------------------
Install Git
- Install Git:
brew install git
- Verify the installation:
git -v
- The output should look like this:
git version 2.51.0
Install IntelliJ
- Install the JetBrains Toolbox:
brew install --cask jetbrains-toolbox - Open JetBrains Toolbox and click “install” on “IntelliJ IDEA”.
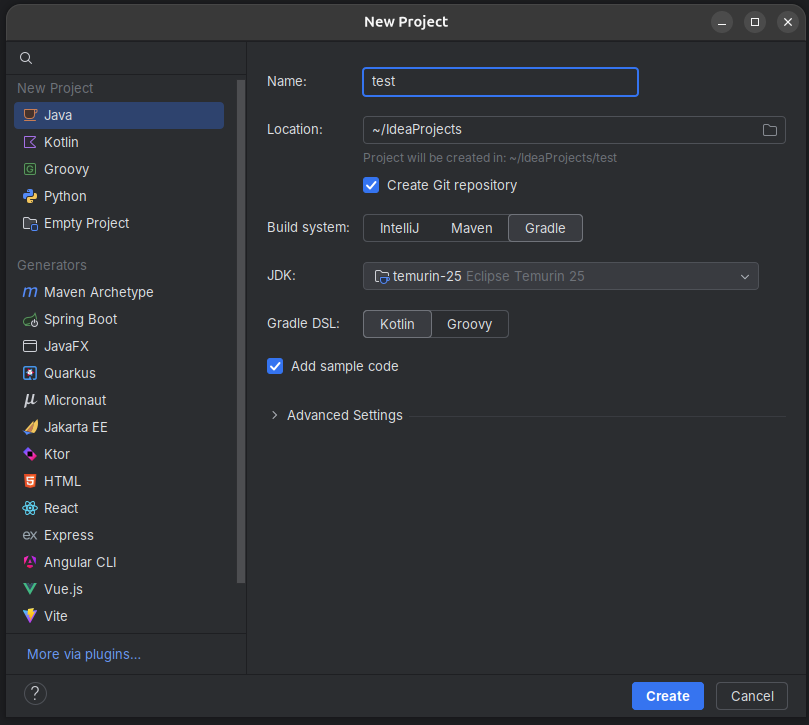
- Open IntelliJ and create a new Java project:
- Name: test
- Location: “~\IdeaProjects”
- Build system: Gradle
- JDK: Eclipse Temurin 25
- Gradle DSL: Kotlin
- Add Sample Code: yes
- In your project open “src/main/java/org.example/Main.java”
- Press the green play button next to the main method and verify that everything works correctly
Examples Repository
- Clone the examples repository (preferable in
~/IdeaProjects):
git clone https://github.com/AcidSepp/kotlin-examples.git
- Place the slides you download from moodle in the
slidesdirectory, to enable opening the examples directly from the slides.
Install Android Studio
- Open JetBrains Toolbox and click “install” on “Android Studio”.
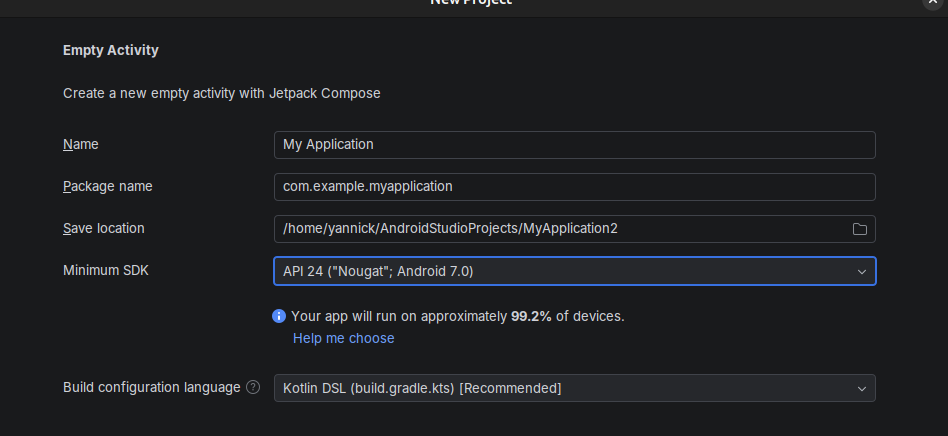
- Open Android Studio and create a new project:
- Phone and large screens: “Empty Activity”.
- Leave everything set to the defaults.
- Install an emulated device:
- Tools > Device Manager > Create Virtual Device
- Select “Small Phone”
- Finish the installation, this takes some time.
- Press the green play button and select “Small Phone” as a target device. Verify that yor app is showing up correctly.
Android Debugging Bridge (optional)
You can use your device for debugging. This is very handy for working with internal phone hardware like the acceleration sensors. Note: make sure you have a fast and reliable USB-C cable.
- Enable adb on your phone: Adb Enabling
- Press the green play button and select
<Your Phone Name>as a target device. Verify that yor app is showing up correctly.